In your terminal, create a new folder called mybulma, navigate to it, then install the Sass gem:
With sass-cli
Use the Sass command line
1. Install Sass #
gem install sass
To try it out, run sass -v and you should see the following:
Sass 3.5.3 (Bleeding Edge)2. Download Bulma #
Get the latest version of Bulma:
Unzip it and put the bulma-0.9.4 folder inside your mybulma folder.
3. 创建一个 Sass 文件 #
创建一个 sass 文件夹用来添加一个叫做 mystyles.scss 的文件:
@charset "utf-8";
@import "../bulma-0.9.4/bulma.sass";
确保 bulma.sass 文件中的路径正确。
4. 创建一个 HTML 页面 #
创建一个使用 Bulma 组件的 HTML 模板。
<!DOCTYPE html>
<html lang="en">
  <head>
    <meta charset="utf-8">
    <meta http-equiv="X-UA-Compatible" content="IE=edge">
    <meta name="viewport" content="width=device-width, initial-scale=1">
    <title>My custom Bulma website</title>
    <link rel="stylesheet" href="css/mystyles.css">
  </head>
  <body>
     <h1 class="title">
        Bulma
      </h1>

      <p class="subtitle">
        Modern CSS framework based on <a href="https://developer.mozilla.org/en-US/docs/Web/CSS/CSS_Flexible_Box_Layout/Basic_Concepts_of_Flexbox">Flexbox</a>
      </p>

      <div class="field">
        <div class="control">
          <input class="input" type="text" placeholder="Input">
        </div>
      </div>

      <div class="field">
        <p class="control">
          <span class="select">
            <select>
              <option>Select dropdown</option>
            </select>
          </span>
        </p>
      </div>

      <div class="buttons">
        <a class="button is-primary">Primary</a>
        <a class="button is-link">Link</a>
      </div>
  </body>
</html>
保存文件为 mypage.html。
注意 css/mystyles.css 路径是您的样式表。这时我们要用 Sass 生成的 CSS 文件的位置。
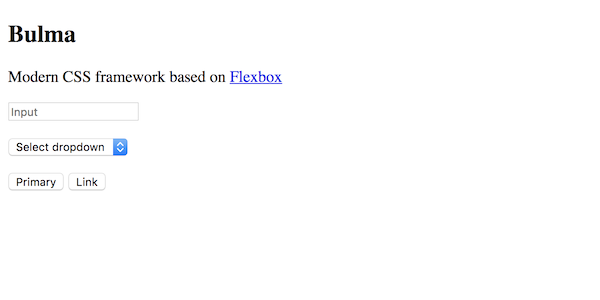
在您的浏览器内打开页面:

5. Build the CSS file #
In your terminal, type the following command:
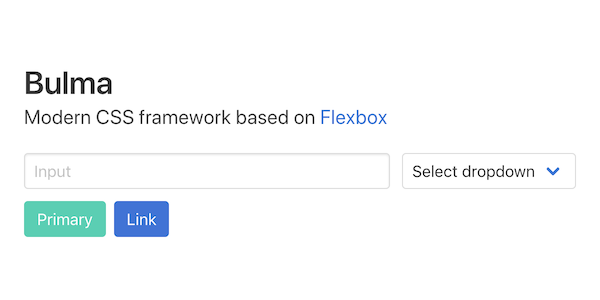
sass --no-source-map sass/mystyles.scss:css/mystyles.cssReload the page and it should be styled like this:

To watch for changes, just launch the following command:
sass --watch --no-source-map sass/mystyles.scss:css/mystyles.css6. 添加您自己的 Bulma 样式 #
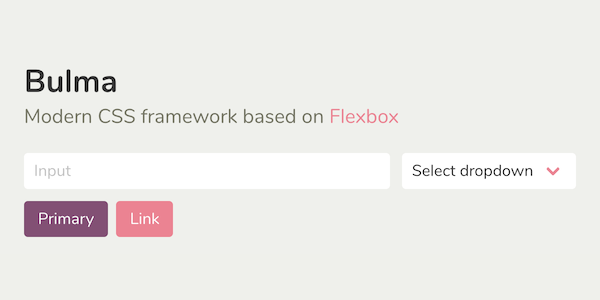
用下面代码替换 mystyles.scss 文件内容:
@charset "utf-8";

// Import a Google Font
@import url('https://fonts.googleapis.com/css?family=Nunito:400,700');

// Set your brand colors
$purple: #8A4D76;
$pink: #FA7C91;
$brown: #757763;
$beige-light: #D0D1CD;
$beige-lighter: #EFF0EB;

// Update Bulma's global variables
$family-sans-serif: "Nunito", sans-serif;
$grey-dark: $brown;
$grey-light: $beige-light;
$primary: $purple;
$link: $pink;
$widescreen-enabled: false;
$fullhd-enabled: false;

// Update some of Bulma's component variables
$body-background-color: $beige-lighter;
$control-border-width: 2px;
$input-border-color: transparent;
$input-shadow: none;

// Import only what you need from Bulma
@import "../node_modules/bulma/sass/utilities/_all.sass";
@import "../node_modules/bulma/sass/base/_all.sass";
@import "../node_modules/bulma/sass/elements/button.sass";
@import "../node_modules/bulma/sass/elements/container.sass";
@import "../node_modules/bulma/sass/elements/title.sass";
@import "../node_modules/bulma/sass/form/_all.sass";
@import "../node_modules/bulma/sass/components/navbar.sass";
@import "../node_modules/bulma/sass/layout/hero.sass";
@import "../node_modules/bulma/sass/layout/section.sass";由于您在监测修改,只需保存文件即可查看结果:

嗯,voilà!您可以安装和定制 Bulma 啦。
![]() 此页面为开放源码页面。
发现排版问题?或者表达模糊?
此页面为开放源码页面。
发现排版问题?或者表达模糊?
在 GitHub 改进该页内容


